Overview
- Introduction
- The Multi/Sub-Object
- Choose the correct material
- Assign a texture to a material
- Filling the Multi/Sub-Object
- Assign a material to an object
- Changing a texture on a polygon
Introduction
This tutorial will show you how to setup any 3ds max material for Re-Volt !
The Multi/Sub-Object
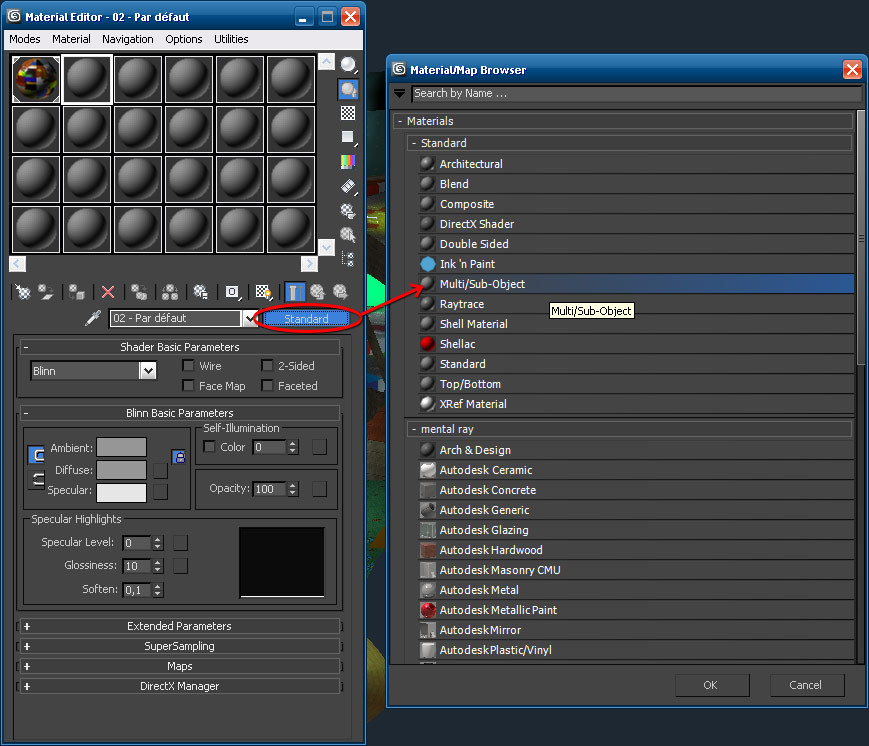
Start by selecting a blank material. Click on the “Standard” button next to the material name and choose a Multi/Sub-Object material.
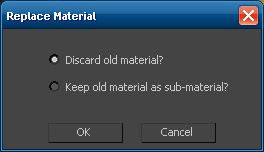
You’ll be asked to choose if you want to keep or discard the material you’re replacing. I advise you to discard it to start with a clean material !
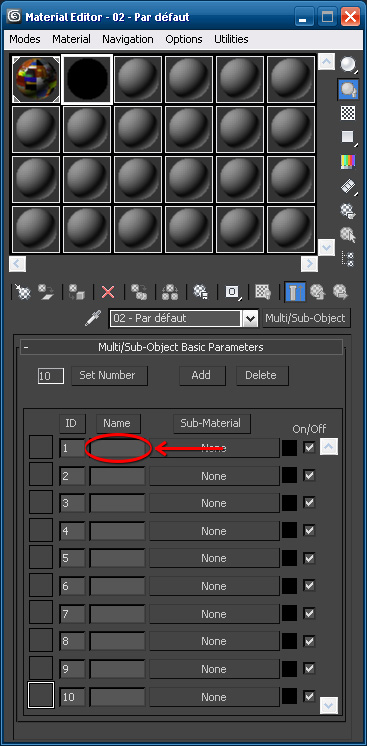
You should now see a material containing 10 sub-materials. Let’s name them.
By default, Re-Volt materials are named like this :
- TrackNameA.bmp
- TrackNameB.bmp
- TrackNameC.bmp
- etc…
What’s important here is the ending letter : A, B, C…
A simple and generic name will be enough ! We will name the materials A, B, C…
Note that Re-Volt support 10 textures per track by default ! Thus the number of sub-materials is already set up. However the newer version of Re-Volt now support more so all you need to do is increase the number here if you need.
Choose the correct material
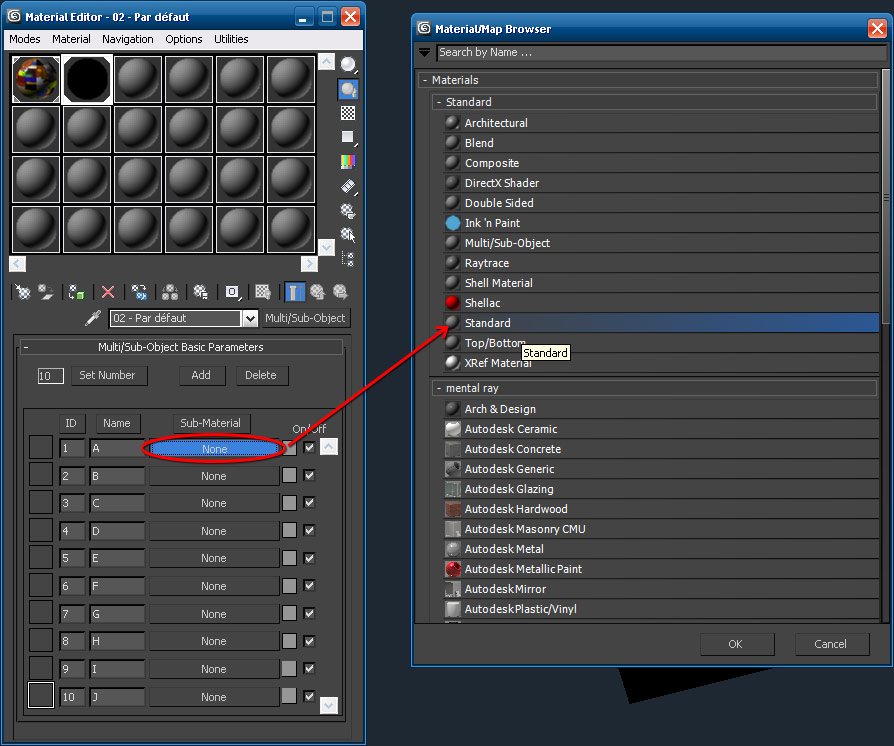
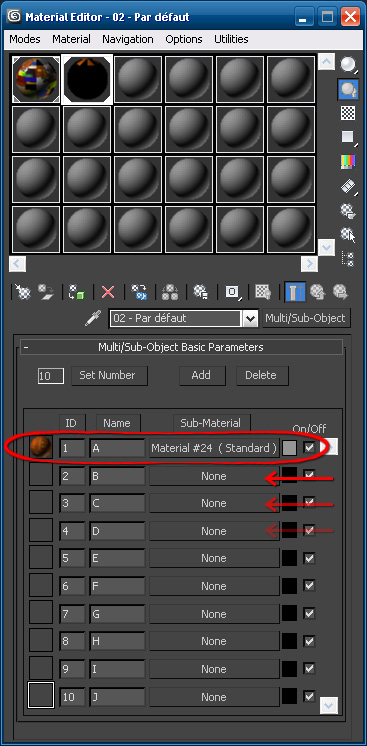
Once the materials are named, we want to add them. Click on the “None” button next to the material name and choose a “Standard” material.
We now have the same material as the blank one with started with ! Instead this time it’s part of a set of materials (the Multi/Sub-Object).
Assign a texture to a material
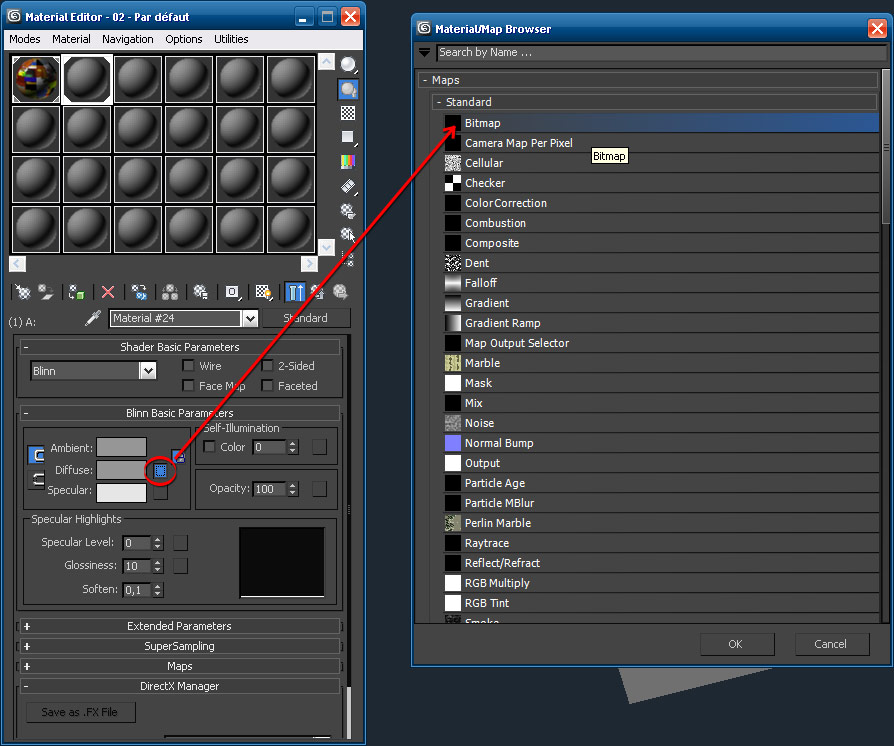
We may now assign a texture to each material : click on the “None” button next to “Diffuse” (it’s the small blank square), and choose a “Bitmap” map !
You’ll be able to pick up you track/car texture file. Here I take the Toy World 1 track textures !
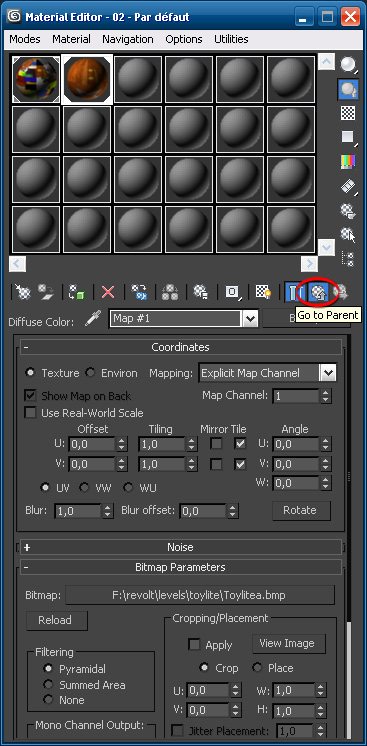
Once the image is selected, you’ll see the texture panel. We must go back to the material level by clicking on the “Go to Parent” button.
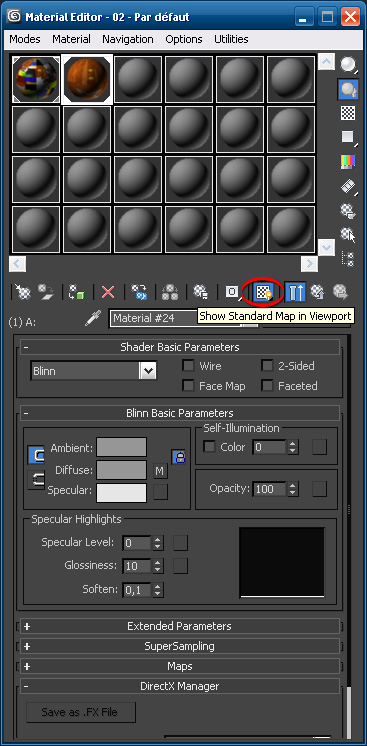
Now we’re back in our material. Tip : to see textures inside the 3ds viewport, this is where you must click on the “Show Standard Map in Viewport” button !
Now that all is ok, we must go back again with the “Go to Parent” button.
And we’re back in our materials set, the Multi/Sub-Object !
Filling the Multi/Sub-Object
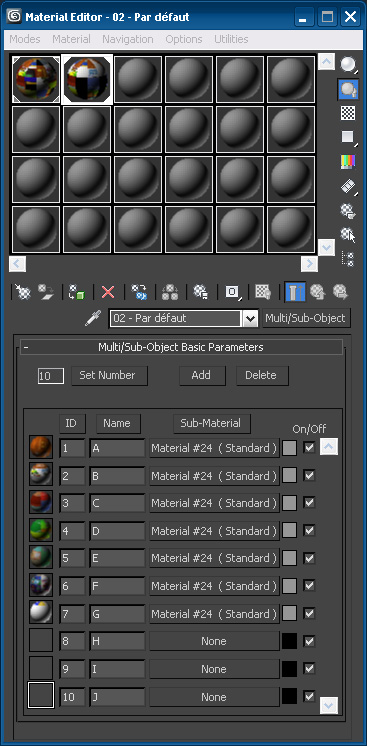
Now to fill it you just have to repeat the same steps. Click on the “None” button and repeat the process.
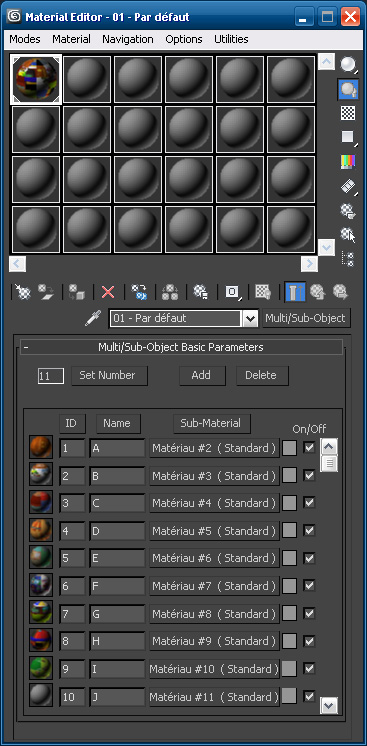
And here’s the result with the Toy World 1 textures !
Assign a material to an object
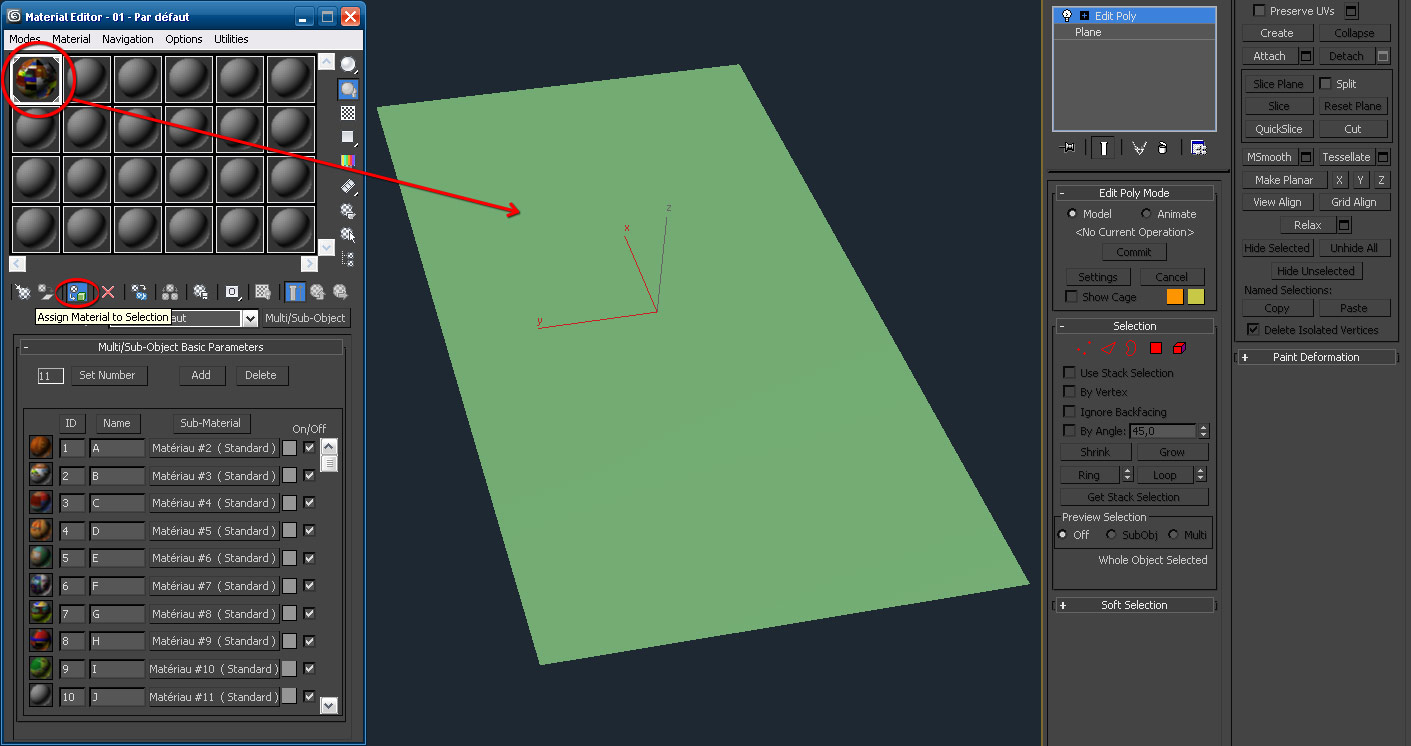
To apply the material, select an object and apply the whole material (the Multi/Sub-Object) onto the object.
You may do so ether by clicking on the “Assign Material to Selection” button or by drag and dropping the material sphere onto the object.
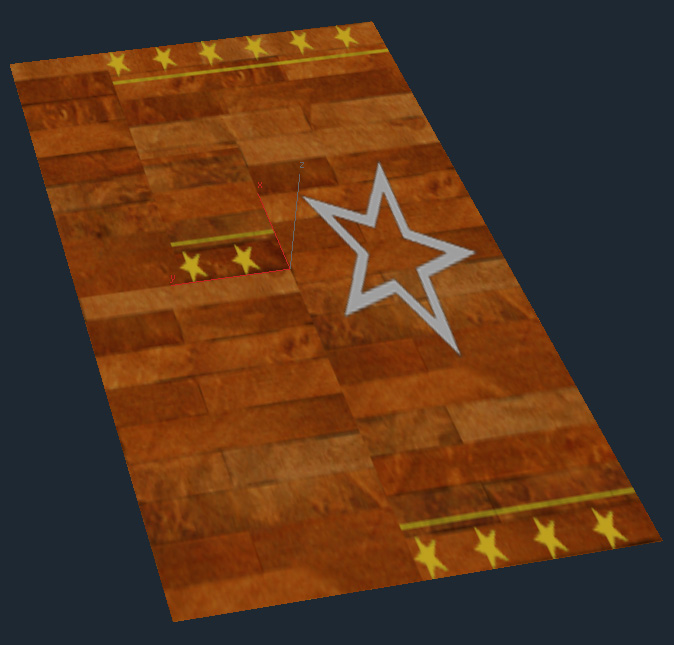
Once the material is applied, you’ll see your textures !!
Changing a texture on a polygon
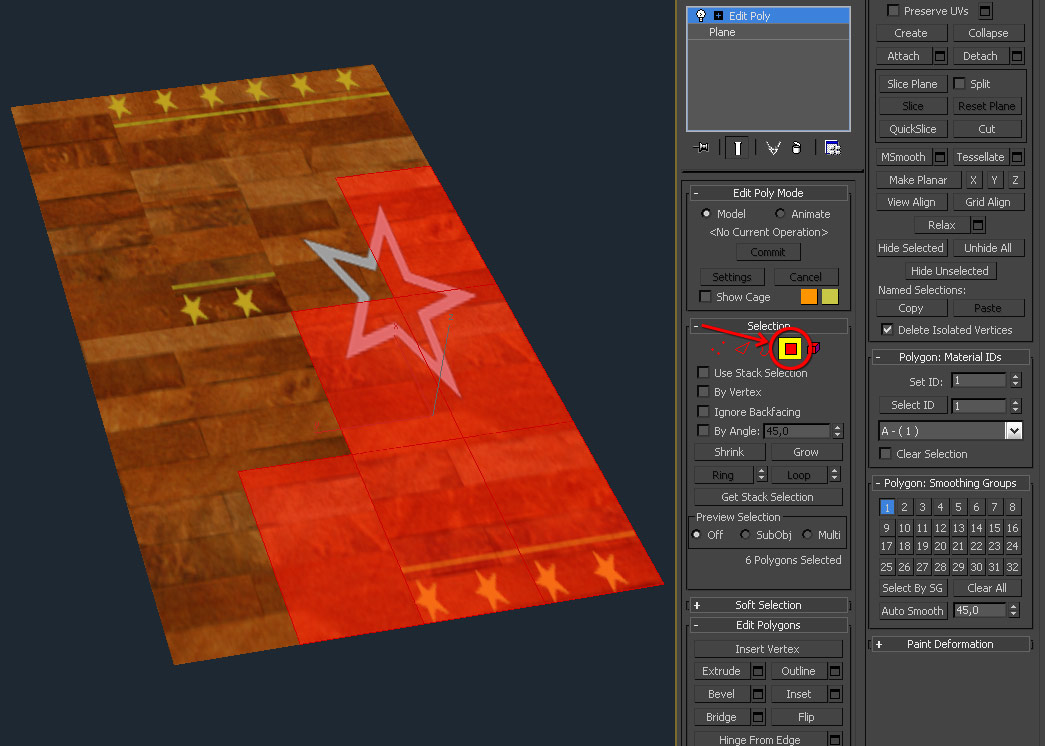
To choose another texture, you need to be at the polygon level. Apply an “Edit_Poly” modifier on your object and select some polygons !
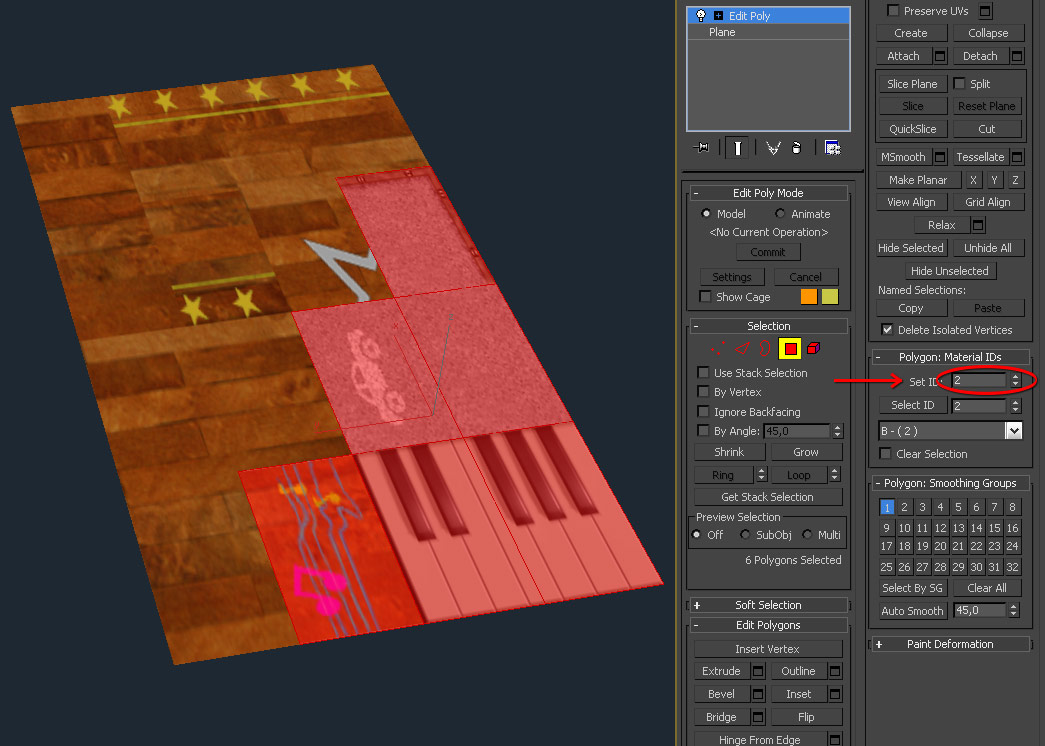
Now to change the texture, set the ID !
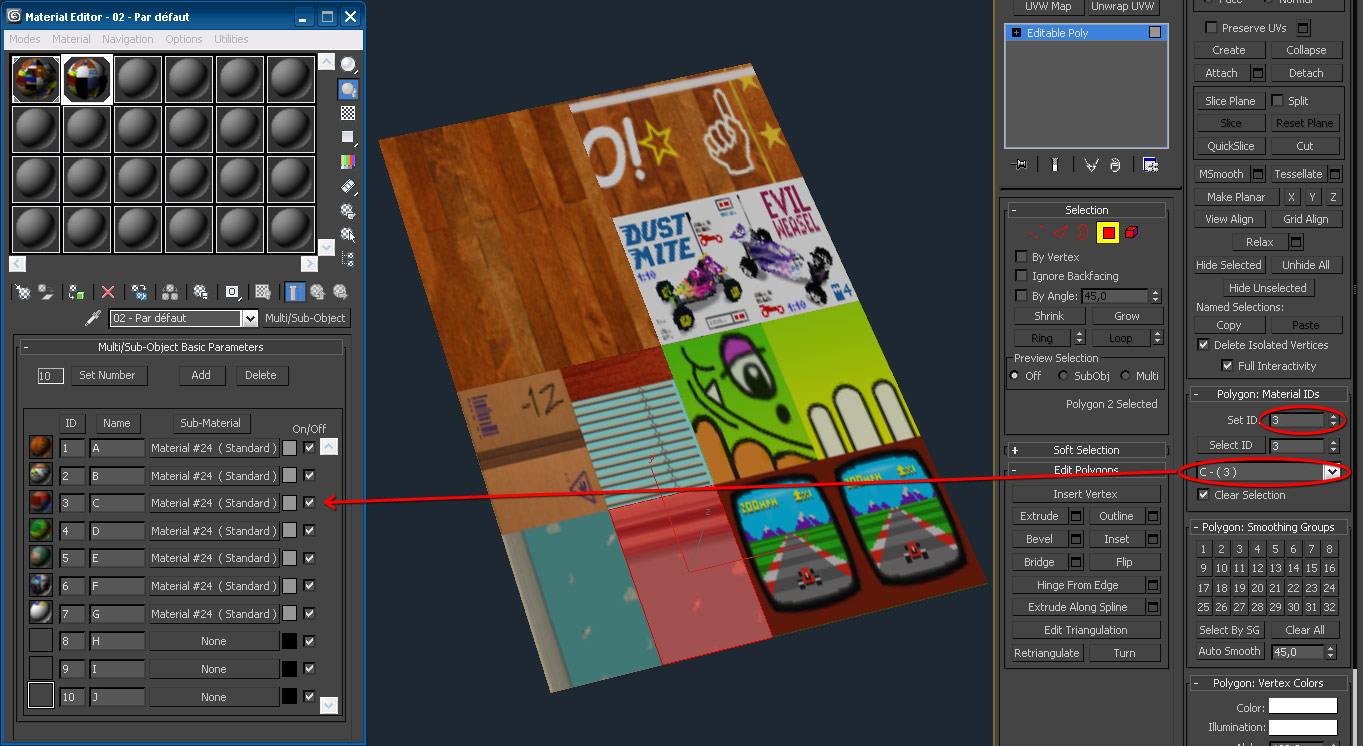
And here’s the result ! Note that when you choose a texture ID the material name is displayed next to it :
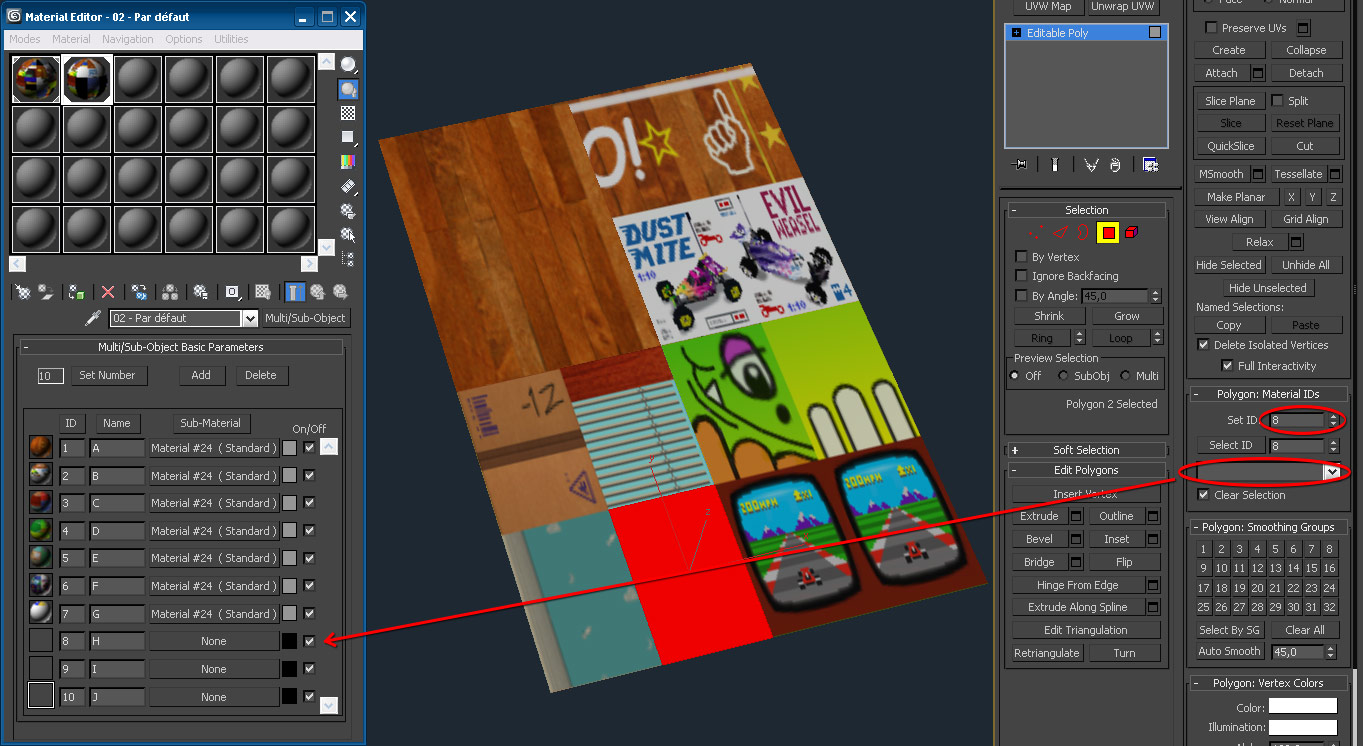
There’s only 7 textures in the Toy World 1 track, so if you set a higher ID the name becomes blank :
There you go ! You’re ready to texture everything !!


