UVs Animator is a small tool for 3ds max. It can create and mix simple UVs animations that would be hard to make by hand.
There’s actually 4 modes available :
- spritesheet
- rotation
- panning & pan repeater
- flowing
![]()
Each mode have its own set of parameters, plus some common parameters. Here’s a short video to show some basic stuff : UVs Animator demo video
Download and install
 >> UVs Animator download <<
Version 1.0
June 11 2017
To install unzip the file and drag and drop the mzp file in a 3ds max viewport. Installation routine is the same as the one used for TexTools (thanks to renderhjs for this !)
>> UVs Animator example file download <<
Here are some example to demonstrate what you can achieve. You need 3ds max 2010 (and after). If you have any problem opening the files, please leave a comment here.
How does it work ?
This tool adds an Unwrap_UVW modifier and animate UVs inside it. So only UVs are animated and nothing else (geometry/materials are untouched).
To deactivate the animation, just turn off/delete the modifier. Collapsing the modifier in the stack will also remove the animation.
![]() CAUTION
CAUTION ![]() Every animation is created on a per-vertex basis. It means that if you have a lot of UVs vertices the animation can take a while to be created ! Also the animation duration have to be taken into account. So animation creation time is dependant of : UVs vertices * Nb of frames
Every animation is created on a per-vertex basis. It means that if you have a lot of UVs vertices the animation can take a while to be created ! Also the animation duration have to be taken into account. So animation creation time is dependant of : UVs vertices * Nb of frames
A good practice would be to weld every vertices before animating.
Basic usage
Select one Edit_Poly object and assign a material so you can see a texture. It should work with any material as long as UVs coordinates are taken into account.
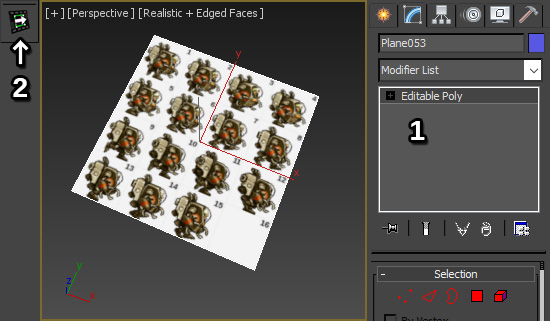
When your Edit_Poly object is selected (1), open the UVs Animator UI (2).
For basic animations, that’s all you need.
The UVs Area
What’s important to remember is that every animation will be set inside the UVs Area.
The UVs Area is the small orange gizmo thing inside the UVW Unrwap modifier. Not the red faces or the vertices, but the orange gizmo surrounding everything else !
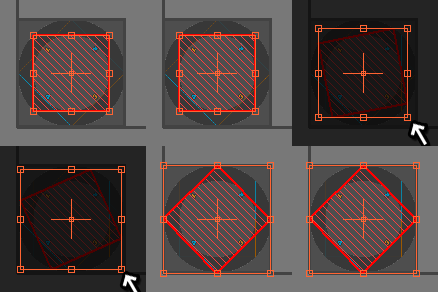
Now you’re ready to launch UVs Animator and play with the different settings ! ![]()
Spritesheet
![]()
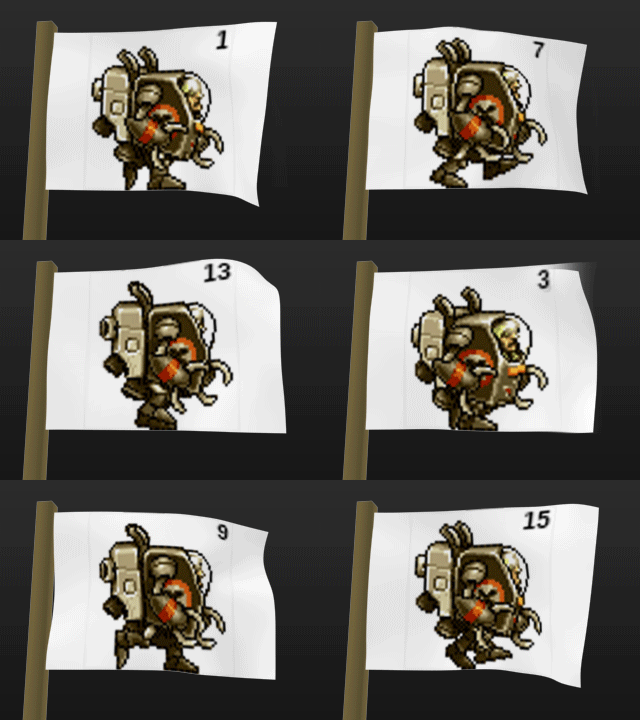
![]()
The spritesheet mode allow to create some spritesheet animation. You can specify the area where the animation lies on the texture (see advanced use).
Parameters :
- Rows : number of rows inside the UVs Area
- Columns : number of columns inside the UVs Area
- Skip last frames : if you have less frames in your animation than the max defined by Rows*Columns (the 4F on the left), you can choose to ignore them. The final length will be displayed on the left under the max length. This may be particularly useful if you want the animation to be played more than once
- Direction : here you can set how to read the atlas
- Fill mode : if you want your animation to be played more than once… Note that you can also copy-paste frames afterwards
You can define a 2nd frame on the timeline if you want to use a different UV shape than the one used to define the spritesheet area. Place the UVs on the first frame of the spritesheet, but on the 2nd of the timeline (please read this 2 times).
(see advanced use)
Note : you may get a fuzzy motion when playing. This is totally normal because 3ds max is interpolating vertex positions inbetween frames. (See advanced use)
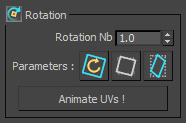
Rotation
The rotation animation mode allow to create a rotating motion (like fans or wheels…). It will create one UV shape for each frame to match the animation duration.
If you ever tried to create rotating motion by hand this is how it would end up :
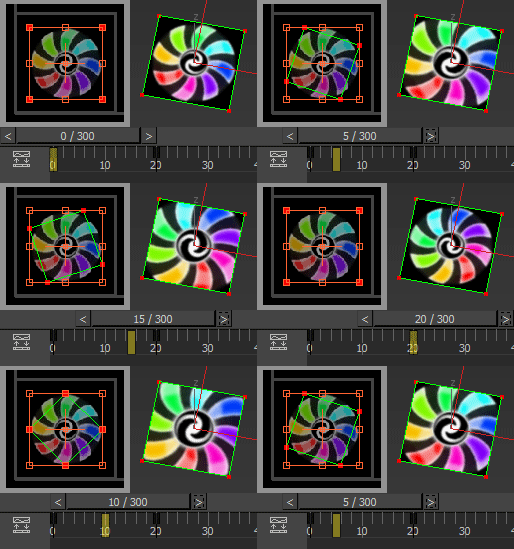
This happens because UVs interpolation works on a per-vertex basis so there’s no other choice than creating a key for each frame.

Parameters :
- Rotation Nb : how many rotations you want
- Parameters :
- rotation direction : clockwise/counter clockwise (final result on geometry)
- fit shape : untouched / inside UVs Area / outside UVs Area
- keep aspect ratio : useful with stretched texture
You can define a 2nd frame on the timeline if you want to use a different UV shape than the one used to define the rotation area.
(see advanced use)
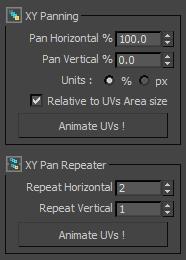
Pan

The panning mode may look like it’s useless since you already can achieve some panning motion using the default interpolation in 3ds max, but hey, i’m a lazy person and I like one-button magic ! ![]()
Actually, it comes in very handy when used in combination with Additive Anim (see advanced use).
Parameters :
- Pan Horizontal : moving horizontally
- Pan Vertical : moving vertically
- Units : when using %, movement is relative to UVs Area size or texture size. When using px be sure to set the right texture size in the Safe Margin settings.
- Relative to UVs Area size : when using %, relative to UVs Area size or texture size.
If you want the animation to loop, pan with a multiple of 100% and it’s better to uncheck Relative to UVs Area size.
You can define a 2nd frame on the timeline if you want to use a different UV shape than the one used to define the panning area.
(see advanced use)
The repeater is a special animation mode. It is useful to keep your UVs within a certain range like when using clamp mode for UVs overflow or if you’re only using part of a texture.
Basic usage is like so : create a panning animation of 100% in each direction. Then, change the repeat values to something like 2 and 3 and apply. Open the Unwrap modifier created and have a look at the UVs while moving the time slider.
Parameters :
- Repeat Horizontal : how many times you want to repeat the panning animation horizontally
- Repeat Vertical : how many times you want to repeat the panning animation vertically
Note : you may get a fuzzy motion when playing. This is totally normal because 3ds max is interpolating vertex positions inbetween frames. (See advanced use)
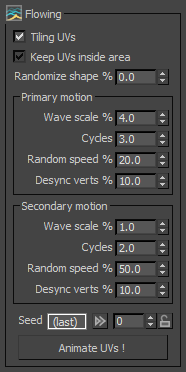
Flowing
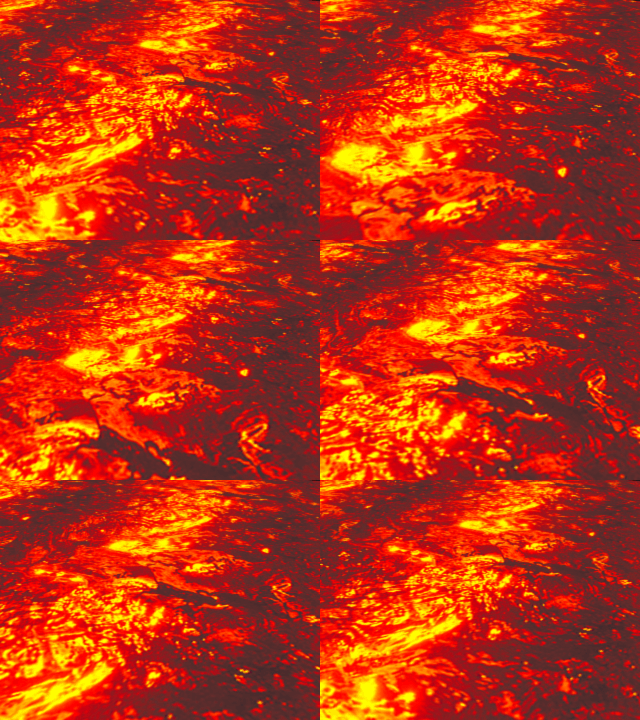

The flowing mode is a custom motion generator to simulate some wavy movement, like water surface. You can play with the different parameters to tweak the motion and create some cool effects. Each animation created will be different ! (unless you decide to lock the random seed ![]() )
)
Motion is created on a per-vertex basis, so to keep your UVs in one piece, you should weld all vertices.
Parameters :
- Tiling UVs : if possible, create a tiling pattern (using only quads and 1 UV shell will help)
- Keep UVs inside area : try to keep the UVs inside the UVs Area (setting reasonably small waves scale will help)
- Randomize shape : 0% is the user-defined shape, 100% will completely mess the UVs
- Primary motion and Secondary motion are working the same way
- Wave scale : how much amplitude you want the wavy movement to be (relative to UVs Area size)
- Cycles : how many waves you want during animation
- Random speed : random speed for vertices
- Desync verts : motion is created on a per-vertex basis and by default all waves are synchronized. Use this to desynchronize waves.
- Seed : this is the random seed used to generate motion. If the motion doesn’t fit your need, just ctrl+z (or delete the modifier) and Animate UVs again until the motion fits your liking. If you want to use the same seed each time, just lock it. You may also re-use the last one by clicking on the small arrows (or copy-paste).
Advanced use
Additive Animation

This is used if you want to mix multiple UVs animations. Just check Use additive anim to add an already created UVs animation to the one you’re about to add.
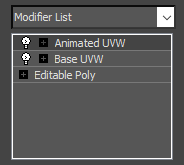
- Transform ref. in baseUVW
This means that instead of using the UVs Area of the last Animated UVW modifier, it will take the one defined in the last non-animated UVW modifier (Base UVW here)
Safe Margin

This will not change anything inside the texture or material. Enter your final image size for information only. Just enter a 100*100 image size if you wish to use percents for margin…
Note : If you’re using additive animation, you should apply the safe margin only on the last animation you will add.
Animation Range

By default, the animation is created to fill the timeline (may not be true for Spritesheet – see fill parameters). So if your timeline is set from 0 to 300, the animation will be 300 frames long (in 3ds 1st and last frame should be the “same” for looping mode), but you can choose to use a custom one. The Match range to custom button will simply set the timeline to the new animation range you’ve set.
Turbo Smooth
You may add a turbo smooth modifier on top of the animation. You can still use the additive mode !
Advanced examples
Removing the fuzzy motion
Spritesheet animation may display strange results when played in the viewport. To get the proper result, you just need to change the tangent type used : before animating by setting the default tangents to stepped, or after like so :
Select the object, open the curve editor and expand the Animated UVW modifier. Select all keys and set tangents to stepped. That’s all !
Defining custom UVs Area
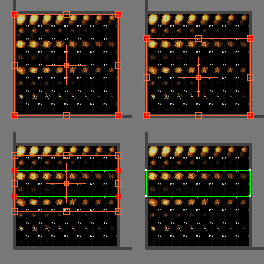
Your texture may have multiple parts like this one :
There are 4 different explosion animations. Let’s say you want to get only the 2nd one, you need to unwrap from the whole texture to this part like this (try to be precise) :
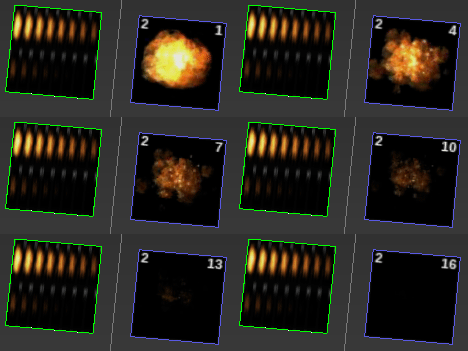
Then add a spritesheet animation with 2 rows and 8 columns, playing horizontally from left to right and up to bottom and you’ll get this :
Defining a custom UV shape
The UVs Area is the surrounding rectangle of the UVs. But what if you want more control ? That’s possible. ![]()
You need a second frame in the Unwrap_UVW modifier. Turn autokey mode on (dont forget !! Even when modifying the first frame !!) and go to the 2nd frame of your animation. Then just edit the UVs, and turn autokey off when you’re done.
Here is an example for rotation mode :
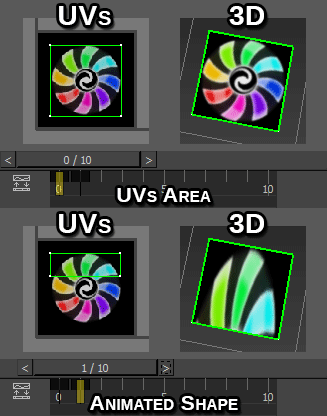
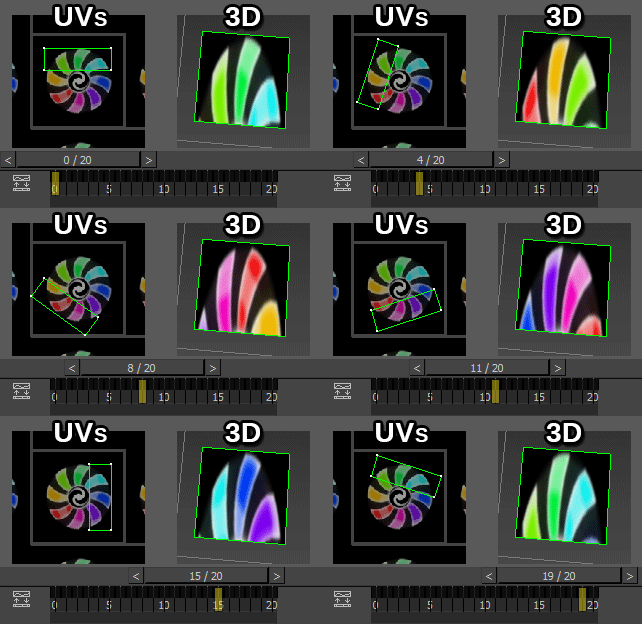
Now if you try to animate the UVs, the UVs Area used is the one from the 1st frame, and the animated UV shape is the one from the 2nd frame :
And that’s it ! ![]() (note : flowing mode will ignore the 2nd frame since it’s quite useless with that mode)
(note : flowing mode will ignore the 2nd frame since it’s quite useless with that mode)
Textures and examples can be downloaded from here : >> UVs Animator example file download <<
Here’s an excerpt of the current TODO list (random order) :
- Add support for multiple UVs shells – animate only selected
- If an Edit_Poly is added and geometry modified after UVs animation, the UVs animation should be transferable to a new Unwrap_UVW
- Add bounce loop mode for spritesheet
- Button to switch values in pan & repeater
- Motion types in tabs
- Animated UVs are detected using only names for now…
- Add presets for flowing
- Add progress bar if it takes too long
- Add cancel
- Existing animation may be shorter than the one you want to Add – repeat over timeline option
- Curves preview for flowing mode
- More efficient detection for tiling mode in flowing mode
- And more…
Feature request : feel free to ask !
Also, if you find any bug, just comment here or in the polycount thread.


Je ne crois pas mes yeux.
Grace à ça, il sera possible de faire des animations en clin d’oeil!
En plus l’interface rend tout possible. Chapeau!!!